This page will show you the basic functionality of Shark Studio. It covers:
- where to find your projects & settings
- the structure of the UI
- how to navigate the 3D canvas
This page will show you the basic functionality of Shark Studio. It covers:
Every screen in BDCreator Plus follows the above structure.
On the right hand side are detailed, illustrated instructions for every step along the way.
Navigate between the individual steps by using the Previous/Forward-buttons.

The available tools differ with the respective step you are on.
Here, you will be able to adjust various settings and parameters. These allow for granular adjustments to your products.

There are two tools thar are always available: the history and visibility tools.
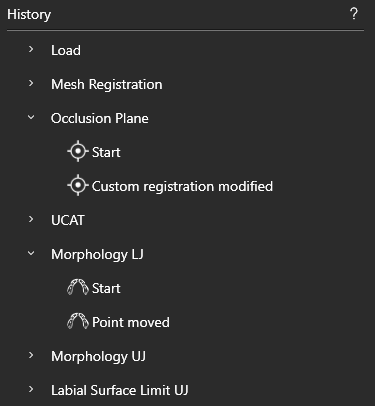
Select the history-tool to view every taken action.
Every action is recorded in the History view. It is always accessible.
Subdivided by the steps in the workflow, you can go back to any previous point, simply by selecting the desired step.
Select the visibility-tool to show/hide specific objects.
To remove clutter and improve legibility, using the visiblity tool, you can
Like the History view, this is always accessible.
The 3D view can be rotated and scaled (zoomed in and out) easily, by using the mouse or the toolbar at the bottom of the scene.
Zooming in and out
By scrolling your mouse or trackpad, the entire scene can be zoomed in and out of.
This can also be done by using the respective tool in the toolbar.
Rotating the scene
Hold the right-mouse button and drag it to rotate the scene.
You can set where the rotation pivots around by setting a pivot point.
Selecting an empty space will reset the pivot point.
The pivot point might be hidden – check your visibility tool, if the pivot point cannot be seen!
Rotate to specific angles
To snap the camera to a specific angle, use the faces in the toolbar.
This allows you to quickly view the scene from above, below or any side.
